 Save
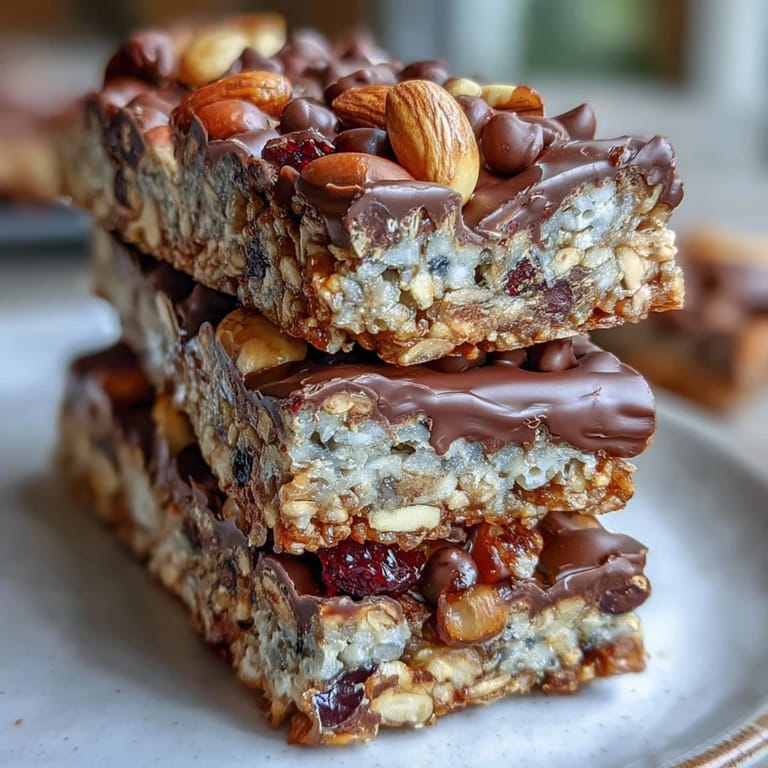
Save Last summer, I was packing for a hiking trip and realized I'd forgotten snacks. Standing in my kitchen at 6 AM with a half-empty pantry, I grabbed whatever I could find—oats, peanut butter, honey—and threw together something that turned out to be better than any store-bought bar I'd ever tasted. These no-bake granola bars became my secret weapon, the kind of thing I now make by the batch and stash everywhere.
My neighbor stopped by one afternoon while I was pressing the mixture into the pan, took one bite of a finished bar, and asked if I could start making them for her kids' school lunches. Now I triple the batch every other week because apparently they're the only snack that doesn't come home uneaten.
Ingredients
- Old-fashioned rolled oats (2 cups): The backbone of these bars—use the thick-cut kind, not instant, or they'll turn mushy. They provide that satisfying chew and stay-with-you feeling.
- Crisp rice cereal (1 cup): This adds a light crunch that keeps the bars from feeling too dense, and it stretches the oats without compromising texture.
- Mixed nuts, chopped (1/2 cup): Almonds, walnuts, pecans—whatever you have or love. Chop them fairly fine so they bind better, but not to dust.
- Dried fruit (1/2 cup): Cranberries, raisins, apricots—pick what you'll actually enjoy eating, because that's what makes a difference.
- Unsweetened shredded coconut (1/4 cup, optional): Skip this if you're not a coconut person, but it adds a subtle flavor that most people can't quite identify until you tell them.
- Salt (1/4 teaspoon): This small amount heightens the sweetness and brings all the flavors into focus.
- Honey or maple syrup (1/2 cup): Both work equally well; use what you have or what you prefer. Honey is slightly stickier, maple syrup slightly lighter.
- Creamy peanut or almond butter (1/3 cup): The binder that holds everything together—don't use powdered peanut butter here, you need the oil content.
- Vanilla extract (1 teaspoon): A small amount that rounds out the flavor without announcing itself.
- Mini chocolate chips (1/4 cup, optional): Add these if you want a hint of chocolate; stir them in after the mixture cools slightly so they don't melt into nothing.
- Chia or flaxseeds (1 tablespoon, optional): An extra boost if you're feeling nutritious, though the bars are plenty good without them.
Tired of Takeout? 🥡
Get 10 meals you can make faster than delivery arrives. Seriously.
One email. No spam. Unsubscribe anytime.
Instructions
- Set up your pan:
- Line your 8-inch square pan with parchment paper, leaving enough hanging over the edges so you can lift the finished bars right out. This step saves you from scraping and swearing.
- Combine the dry goods:
- In a large bowl, toss together the oats, rice cereal, nuts, dried fruit, coconut if using, and salt. Give it a good stir so everything's distributed evenly—you don't want one bar packed with nuts and another with mostly oats.
- Warm the binder:
- In a small saucepan over low heat, combine the honey and peanut butter. Stir gently for 2-3 minutes until it's completely smooth and warm—you'll notice the mixture becomes more fluid and easier to work with. Remove from heat and stir in the vanilla.
- Bring it together:
- Pour the warm mixture over the dry ingredients and stir thoroughly, making sure every oat and nut gets coated. It'll look a bit loose at first, then tighten up as you mix.
- Add chocolate carefully:
- If you're using chocolate chips, wait 2-3 minutes for the mixture to cool slightly before stirring them in. This prevents them from completely melting and disappearing into the bars.
- Press into the pan:
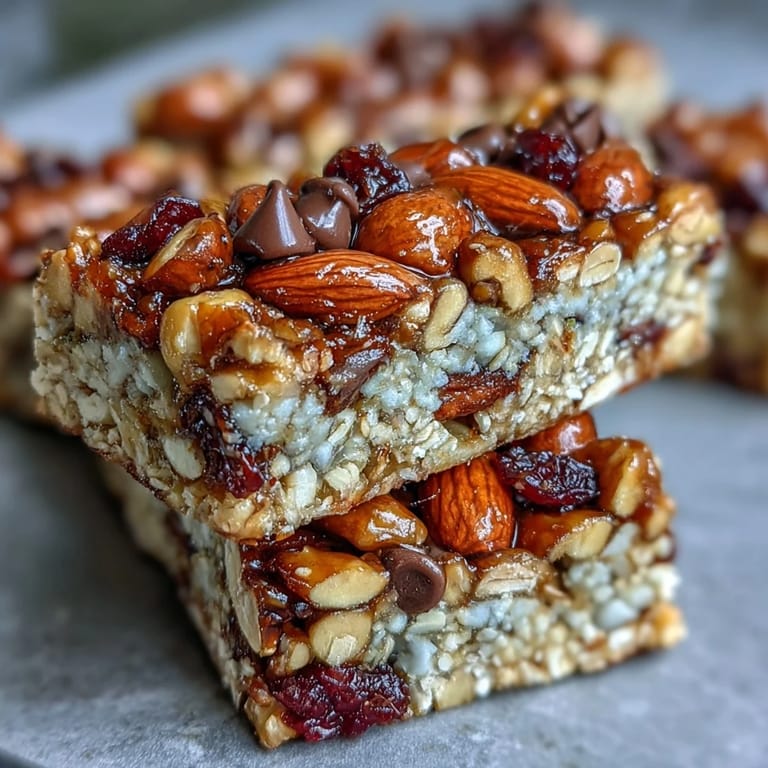
- Transfer the mixture to your prepared pan and press it down firmly and evenly using a spatula or the back of a measuring cup. Don't be timid here—the firmer you press, the better the bars will hold together when you cut them.
- Top it off:
- If you like, sprinkle a few more chocolate chips or nuts on top and press them in gently so they stick.
- Chill until set:
- Refrigerate for at least 1 hour. You can test it by pressing the surface with your finger—it should feel firm, not sticky.
- Cut and store:
- Use the parchment overhang to lift the whole block out of the pan, then cut into 12 bars with a sharp knife. Wipe the knife between cuts if it gets sticky. Store in an airtight container in the fridge for up to a week.
 Save
Save There's something satisfying about making snacks that feel homemade and real, especially ones you can grab on a rushed morning without guilt. These bars remind me that sometimes the best kitchen solutions come from running late and improvising.
Make It Your Own
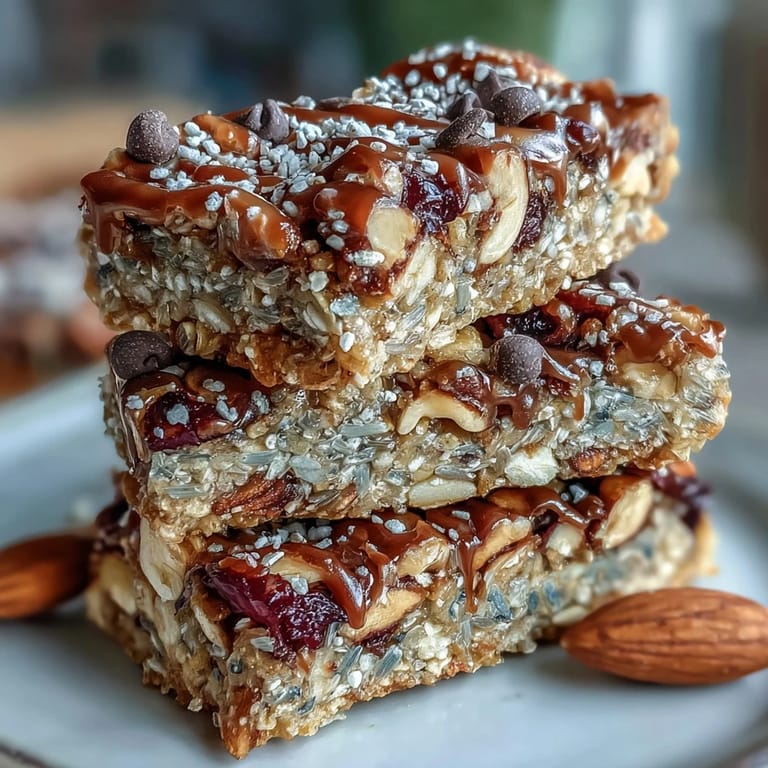
These bars are flexible enough to work with almost anything in your pantry. I've made them with trail mix scraps, leftover granola, pumpkin seeds instead of nuts, and even crushed pretzels for a salty kick. The formula is simple: about 3 cups of dry ingredients to 1 cup of wet binding mixture. Once you understand that ratio, you can riff endlessly.
Storage and Shelf Life
Keep these in an airtight container in the refrigerator, where they'll stay fresh for a full week. If your kitchen is cool enough, they can actually sit at room temperature for a day or two without getting soft, but I prefer the crisp texture when they're cold. You can also freeze them for up to three weeks if you want to make a bigger batch and eat them slowly.
Variations Worth Trying
The base recipe is just a starting point. I've experimented with adding spices like cinnamon, cardamom, or a pinch of ginger—they add complexity without overwhelming the bar. For a vegan version, swap the honey for maple syrup and use dairy-free chocolate chips. If you need to avoid nuts for allergies, sunflower seed butter and pumpkin seeds work beautifully and give you that same rich texture.
- Nut-free option: Use sunflower seed butter instead of peanut butter and swap mixed nuts for seeds like sunflower or pumpkin.
- Spiced version: Stir 1/2 teaspoon cinnamon and a pinch of cardamom into the honey-butter mixture for warmth and depth.
- Tropical twist: Use dried mango or pineapple instead of cranberries and add 1/2 teaspoon of coconut extract to the wet mixture.
 Save
Save These bars prove that some of the most satisfying things you make in the kitchen don't need an oven or complicated techniques. They just need good ingredients and a little bit of attention.
Recipe Questions & Answers
- → Can I use a different nut butter?
Yes, sunflower seed butter works well for a nut-free alternative without sacrificing creaminess.
- → How should I store these bars?
Store them in an airtight container in the refrigerator for up to one week to keep fresh and firm.
- → Can I add spices to the mixture?
Absolutely! Cinnamon or cardamom can be added for extra warmth and depth of flavor.
- → Are vegan options possible?
Yes, substitute honey with maple syrup and use dairy-free chocolate chips to keep it plant-based.
- → What is the best way to press the mixture?
Use a spatula or the back of a flat-bottomed cup to press the mixture evenly into the pan for uniform bars.